Nail art has evolved into a fun and creative way to express personal style, and the best part is, you don’t need to visit a salon to achieve fabulous designs.
With a little practice and the right tools, you can create intricate and stunning nail art designs at home that rival professional manicures. Below are eight stylish and easy-to-do nail art designs that will elevate your nail game and have you showing off your manicure with pride.
Create Stunning Nail Art Designs
1. Classic French Manicure with a Twist
The classic French manicure is timeless, but adding a modern twist can give it a fresh look. Instead of the traditional white tips, try using metallic shades like gold or silver, or opt for bold colors such as red or blue for the tips.
For an extra pop, use a glitter topcoat to give your nails a sparkly finish. This design is elegant, versatile, and perfect for any occasion.
2. Minimalist Geometric Shapes
If you like a simple and elegant style, minimalist geometric nail art is a great choice. You can use small brushes or tape to make basic shapes like lines, triangles, or squares on your nails.
Use basic colors for a classy look, or try bright colors for a bold look. You can easily make geometric patterns at home for a stylish, simple style.
3. Ombre Gradient Nails
Ombre nails are one of the most popular designs, and you can easily create this stunning look at home. All you need are two to three nail polish colors and a makeup sponge.
Apply your chosen shades onto the sponge in stripes, then gently dab it onto your nails to blend the colors seamlessly. This design works well with both pastel hues for a soft, feminine look or vibrant colors for a bold and edgy finish. Top it off with a clear topcoat to smooth the gradient.
4. Polka Dot Perfection
For a playful and retro design, polka dot nail art is an easy go-to. You can use a dotting tool or a bobby pin to create perfectly round dots on your nails.
Pick a different color for the dots to make them noticeable, like black dots on a white background or bright neon colors on a plain background. Polka dots are fun, can be worn for many occasions, and give a cute and unique look, making them great for casual events.
5. Negative Space Nails
A popular new trend in nail art is negative space designs, which leave some of your natural nail showing. This design is easy but still makes a statement, and you can create it using striping tape or nail stickers.
Create shapes such as triangles, stripes, or half-moons and leave portions of your nail bare while painting the rest. Negative space nails give off a modern and artistic look and can be done using neutral shades or bold color combinations.
6. Marble Effect
Marble nails give a sophisticated and luxurious appearance and are surprisingly easy to achieve at home. All you need is a small piece of plastic wrap or cling film.
Start by painting your nails with a base color, then apply a second color and quickly dab it with the crumpled plastic to create the marble effect. For a marble-style nail look, use black, white, and gray colors & add a shiny topcoat. This design is great for people who want their nails to look stylish & neat.
7. Floral Nail Art
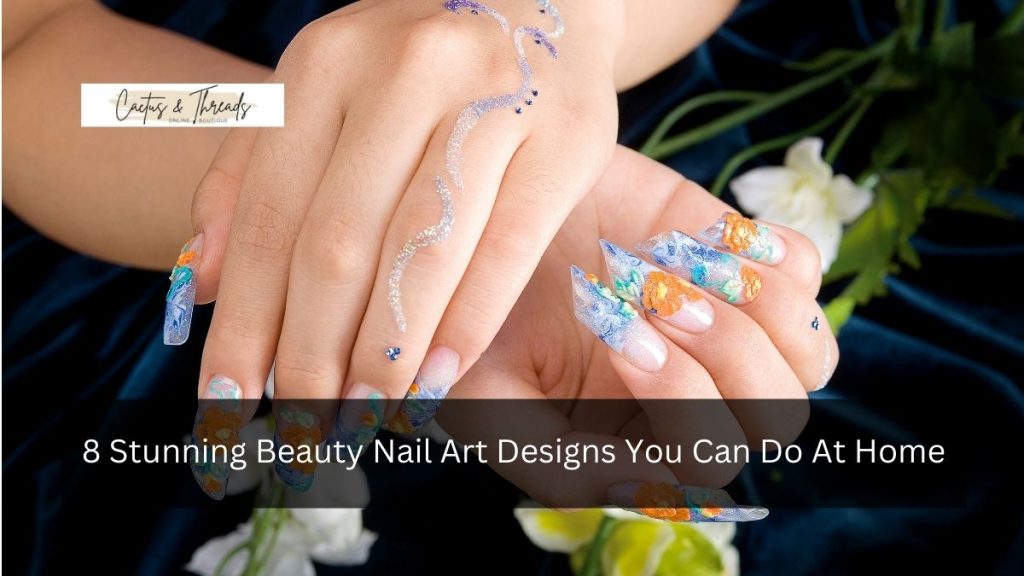
Floral nail art is feminine, beautiful, and perfect for spring or summer. You can use a fine brush or a toothpick to create delicate flower petals and leaves.
Start by painting small dots in the shape of a flower on your nails, then add tiny leaves for detail. Choose light colors for a gentle, loving style or bright colors for a fun design. Flower nails can make your look more lively and classy.
8. Glitter Accent Nails
If you want to add some glam to your nails, a glitter accent nail is the perfect choice. Rather than covering all of your nails in glitter, paint just one or two nails with a glitter polish to create an accent.
You can make a gradual glitter effect by putting glitter polish on the nail’s tip and fading it down. This style gives a little sparkle without being too much and is great for parties or going out at night.
Tips for Creating Stunning Nail Art at Home
To achieve flawless nail art designs, follow these tips to ensure a professional-looking finish:
- Prep your nails: Before you begin, make sure your nails are clean & don’t have any oils on them. Put on a base coat to keep your nails safe and make them nice and smooth for the nail polish.
- Use quality tools: Invest in fine nail brushes, dotting tools, and striping tape to make intricate designs easier to achieve.
- Be patient: Nail art requires precision, so take your time and allow each layer to dry before moving on to the next.
- Seal your design: Always finish your nail art with a clear topcoat to protect the design and add a glossy finish.
- Practice makes perfect: If you’re new to nail art, don’t be discouraged if your first few designs don’t turn out as expected. Keep practicing, & you’ll improve over time.
Conclusion:
Creating stunning nail art designs at home is both fun and affordable. With a little creativity and the right tools, you can transform your nails into a masterpiece. From minimalistic styles to intricate patterns, there’s no limit to what you can achieve.
The key is to practice and experiment with different designs and techniques until you find what suits you best. So, gather your supplies, let your imagination run wild, and enjoy the process of making your nails a true reflection of your personal style.


