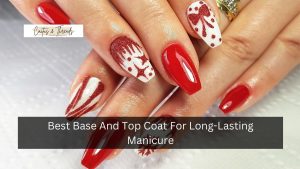
Achieving beautiful nail art doesn’t always require a salon visit. With a few simple tools and a little creativity, you can create stunning nail art designs right at home.
From minimalist patterns to eye-catching gradients, there are plenty of designs that are easy to do yet look professional. Here are 12 beautiful nail art ideas that you can try to transform your nails into works of art.
1. Simple Polka Dots
Polka dots are a classic, easy-to-create nail art design that’s perfect for beginners. Start by applying a base color, then use a toothpick or dotting tool dipped in a contrasting color to create small dots across your nails. For a polished look, make the dots uniform in size, or for a playful vibe, vary their sizes.
Key Tips:
- Choose two contrasting colors for a bold effect.
- Seal with a top coat to keep the dots looking fresh.
2. Gradient Ombre Nails
Ombre nails are always in trend, and they’re surprisingly easy to do at home. Start by painting your nails with a base coat. Next, take a makeup sponge and apply two or three shades of polish onto the sponge in stripes. Dab the sponge on your nails to blend the colors, creating a smooth gradient effect.
Key Tips:
- Experiment with different color combinations.
- Clean the edges with a brush dipped in nail polish remover for a clean finish.
3. Striped Nails
Striped nails are stylish and simple to create. Use nail striping tape to create perfect lines. Apply a base color, let it dry, and place the tape in the desired pattern. Paint over it with another color, then remove the tape to reveal sharp, clean lines.
Key Tips:
- Use metallic or glitter polish for a glamorous look.
- Try vertical, horizontal, or diagonal stripes.
4. Glitter Gradient Tips
For a sparkly, elegant look, apply a glitter polish just to the tips of your nails. This design is easy and perfect for special occasions. Start with a neutral base coat, then dab glitter polish on the tips using a sponge or the polish brush.
Key Tips:
- Use fine glitter for a subtle effect or chunky glitter for more sparkle.
- Apply a top coat to seal the glitter and prevent chipping.
5. Minimalist Negative Space
Negative space nails are trendy and sophisticated. Start with clear or nude polish, and add simple designs like dots, lines, or small shapes on each nail. Leaving some areas of the nail bare creates a chic look that’s perfect for everyday wear.
Key Tips:
- Use nail art pens for precise details.
- Keep it minimal for a classy, understated look.
6. Floral Nails
Floral nails add a touch of elegance to your look and can be achieved easily with a toothpick or thin brush. Start with a pastel or white base, then use a contrasting color to create small petals and dots for flowers.
Key Tips:
- Experiment with colors for a personalized design.
- Add tiny dots in the center of each flower for a realistic effect.
7. French Tips with a Twist
Classic French tips get a modern upgrade with this design. Instead of white, try a bold color or glitter polish on the tips. Apply a clear or nude base, then carefully paint the tips with a vibrant shade using a fine brush.
Key Tips:
- Use tape or guides to ensure clean lines.
- Try a double-tip design for a unique look.
8. Marble Nails
Marble nails may seem fancy, but they’re actually simple to make. Start with a white or light base coat. Use a thin brush to put some gray polish on the nail and blend it gently for a marbled look. Do the same with black polish to add more dimension.
Key Tips:
- Use a thin, angled brush for best results.
- Apply a top coat to make the marble effect look smooth and glossy.
9. Animal Print
Animal patterns like leopard or zebra make your nails look wild and fun. To make a leopard design, start with a light color and use a toothpick to make random brown or black spots. Finish by adding small black dots around the spots.
Key Tips:
- Use different colors for a unique twist on classic animal print.
- Keep patterns minimal on accent nails for a balanced look.
10. Geometric Patterns
Use tape or nail stencils to make cool designs on your nails. Put the tape on your nails in the shape you want, then paint over it with a different color.
Key Tips:
- Choose bold colors for a striking design.
- Mix and match shapes for a dynamic look.
11. Color-Blocked Nails
Color-blocking is a fun way to use lots of colors on one nail. First, paint your nail one color. Once it’s dry, use tape to separate sections and paint each one a different color. This design is great for mixing bright & bold colors.
Key Tips:
- Pick complementary colors for a cohesive look.
- Use a glossy top coat to make colors pop.
12. Starry Night Nails
Give your nails a starry night look by starting with a dark blue or black base. Use a small brush or toothpick to make tiny white dots and stars. Finish off with some silver glitter polish.
Key Tips:
- Add a crescent moon shape for extra detail.
- Use a matte top coat for a softer night-sky effect.
Conclusion:
Creating beautiful nail art designs at home is a fun and affordable way to express your creativity. Whether you prefer a minimalist look or a bold, colorful pattern, these 12 nail art ideas offer something for everyone.
With a few simple tools and techniques, you can achieve a salon-quality look that you’ll be proud to show off. Embrace your inner artist, and enjoy exploring new styles for every occasion!


